WordPress Login Security: 2FA, Brute Force Protection & Best Practices
 By Admin
9 min read
By Admin
9 min read 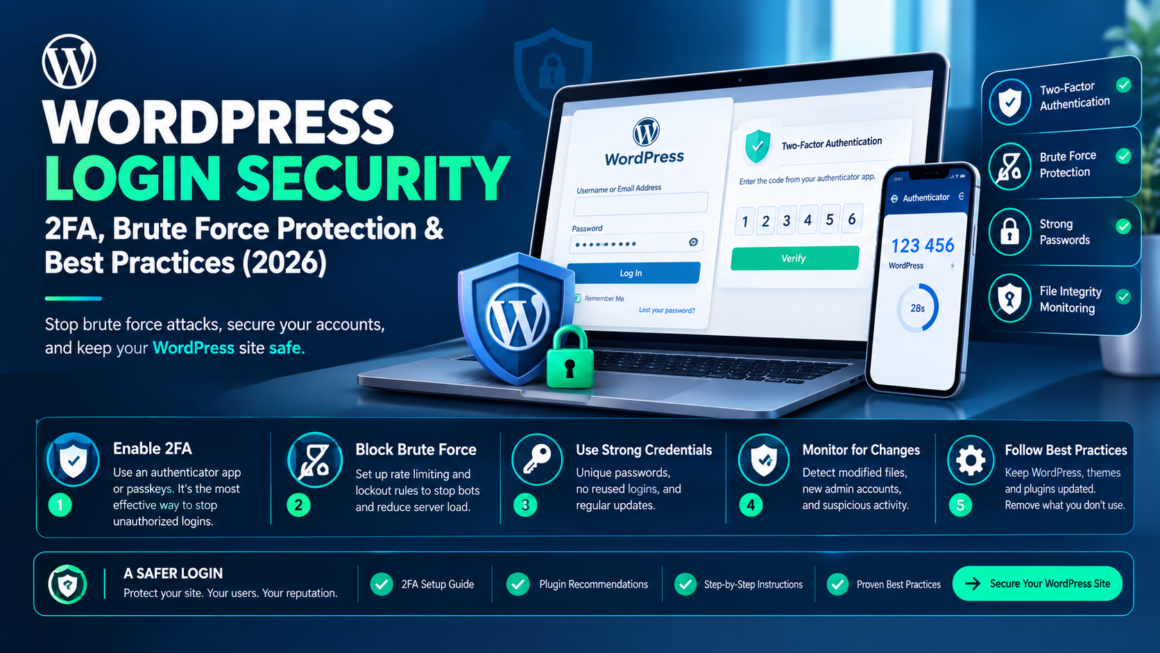
Your WordPress login page is at /wp-login.php. Every bot on the internet knows that. Wordfence blocks over 6.4 billion brute force login attempts every month across its network that’s the permanent baseline, not a spike. Cloudflare’s 2026 data shows that 94% of all login attempts across the web are automated, and nearly half the remaining human attempts use passwords already found in breach databases.
Your login page isn’t mostly serving your users. It’s mostly serving attackers. This guide covers how to secure WordPress login security at every layer: two-factor authentication, brute force protection, credential hygiene, and the specific hardening steps that shut down the most common attack paths. Most take under five minutes.
Why the Default WordPress Login Is Vulnerable
WordPress isn’t insecure by design it’s predictable. Every default installation shares:
- The same login URL:
/wp-login.phpand/wp-admin/. - The same XML-RPC endpoint:
/xmlrpc.php(which allows authentication attempts without touching the login page). - A publicly exposed username via the REST API (
/wp-json/wp/v2/users/) and author archives (/?author=1). - No rate limiting, no 2FA, and no account lockout out of the box.
This predictability is the problem. An attacker doesn’t need to find your login page or guess your username both are given to them. All that’s left is the password. And with credential stuffing using billions of leaked passwords from other breaches, they don’t even need to brute-force it from scratch.
Layer 1: Two-Factor Authentication (The Single Most Important Step)
If you do one thing from this entire guide, do this. 2FA effectively eliminates brute force as a viable attack vector. Even if an attacker has the correct password, they can’t log in without the second factor. Data from 2025 shows 2FA adoption among WordPress users reached 70%, and sites with 2FA enabled saw approximately a 73% reduction in unauthorized login attempts largely because bots detect 2FA and move on to easier targets.
How to set it up
Most security plugins include 2FA. If you’re running Wordfence (recommended in our security plugins comparison), it’s built in:
Wordfence → Login Security → Two-Factor Authentication
- Download an authenticator app Google Authenticator, Authy, or Microsoft Authenticator.
- Scan the QR code Wordfence shows.
- Enter the 6-digit code to confirm.
- Save the recovery codes somewhere offline not in your email, not on the server.
- Enforce 2FA for all Administrator and Editor roles.
If you’re not using Wordfence, WP 2FA is a solid standalone plugin with role-based enforcement and grace periods for users who haven’t set up their second factor yet.
Which 2FA method to use
| Method | Security level | Notes |
|---|---|---|
| Authenticator app (TOTP) | High | The standard. Works offline, no phone service needed. Use this. |
| Hardware key (WebAuthn / passkeys) | Highest | Phishing-proof. Best for high-value accounts. Supported by Wordfence and WP 2FA. |
| SMS | Moderate | Better than nothing, but vulnerable to SIM-swapping. Avoid for admin accounts if possible. |
| Low | The code sits in the same inbox an attacker is trying to compromise. Last resort only. |
Passkeys are the emerging best option phishing-proof, no codes to type, and supported in all major browsers and operating systems as of 2025. If your plugin supports them (Wordfence does via WebAuthn), use them for admin accounts.
Layer 2: Brute Force Protection
2FA stops successful logins with stolen credentials. Brute force protection stops the attempts from reaching that point reducing server load, log noise, and the chance of a lucky guess on accounts without 2FA.
Rate limiting (login attempt throttling)
Lock out IP addresses after repeated failed attempts. This is the most basic protection and should be on every WordPress site.
With Wordfence: Wordfence → All Options → Brute Force Protection:
- Lock out after 5 failed login attempts.
- Lock out after 3 forgotten password attempts.
- Lockout duration: 4 hours (or longer 24 hours is fine for most sites).
- Immediately lock out invalid usernames this blocks bots guessing both username and password.
Standalone option: Limit Login Attempts Reloaded lightweight, focused, and handles the job without a full security suite.
Why rate limiting alone isn’t enough
Traditional rate limiting blocks single-IP rapid attempts the “naive” brute force. But modern attacks are distributed: thousands of IPs from botnets, each trying 2–3 passwords before rotating. Rate limiting at the IP level doesn’t see a pattern when each IP only appears twice. That’s why you need 2FA as the backstop rate limiting reduces volume, 2FA eliminates the threat.
Layer 3: Reduce Login Surface Area
Change the login URL
Your login page at /wp-login.php is the single most attacked URL on any WordPress site. Moving it to a custom path removes your site from the automated scans that target the default URL.
WPS Hide Login is the simplest plugin for this one setting, no database changes:
Settings → WPS Hide Login → set your custom URL (e.g., /my-secure-login).
After activation, /wp-login.php and /wp-admin/ return a 404 for unauthenticated visitors. Bots scanning the default path find nothing. This isn’t security by obscurity as your only defense it’s surface area reduction layered on top of 2FA and rate limiting.
Disable XML-RPC
xmlrpc.php allows password authentication attempts outside the login page. A single XML-RPC system.multicall request can test hundreds of passwords in one HTTP request, bypassing per-attempt rate limiting. If you’re not using XML-RPC (most modern sites don’t the REST API replaced it), disable it:
// Add to functions.php or a custom plugin
add_filter('xmlrpc_enabled', '__return_false');
Or block it at the server level in .htaccess:
<Files xmlrpc.php>
  Order Allow,Deny
  Deny from all
</Files>
Wordfence can also disable XML-RPC authentication under its brute force settings.
Hide username enumeration
By default, WordPress leaks usernames through:
- Author archives:
yourdomain.com/?author=1redirects to/author/admin/, revealing the username. - REST API:
yourdomain.com/wp-json/wp/v2/users/returns a JSON list of all users.
Block both:
// Disable REST API user enumeration for unauthenticated requests
add_filter('rest_endpoints', function($endpoints) {
    if (!is_user_logged_in()) {
        if (isset($endpoints['/wp/v2/users'])) {
            unset($endpoints['/wp/v2/users']);
        }
        if (isset($endpoints['/wp/v2/users/(?P<id>[\d]+)'])) {
            unset($endpoints['/wp/v2/users/(?P<id>[\d]+)']);
        }
    }
    return $endpoints;
});

// Block author archive enumeration
add_action('template_redirect', function() {
    if (is_author()) {
        wp_redirect(home_url(), 301);
        exit;
    }
});
Without the username, attackers have to guess both halves of the credential exponentially harder.
Layer 4: Password Hygiene
All the layers above protect against external attacks. Password hygiene protects against the credentials themselves being weak.
Requirements for every admin account
- Minimum 16 characters. WordPress doesn’t enforce a minimum by default. Use a password policy plugin or enforce it through team policy.
- Unique per site. If your WordPress password is the same as your email password, a breach on either compromises both. Password managers (1Password, Bitwarden) eliminate the memory burden.
- Not in a breach database. Check at haveibeenpwned.com. Some security plugins (Wordfence) can enforce this automatically blocking passwords found in known breaches.
- No “admin” username. If your admin username is
admin, create a new Administrator account with a different name, transfer ownership, and delete the old one. Never just rename it some plugins store the original username.
Application passwords
WordPress generates Application Passwords for REST API and XML-RPC authentication (since WordPress 5.6). These are separate from your login password and can be revoked individually. If you use any external service that authenticates to your WordPress site (mobile apps, external editors), use an application password instead of your main credential and revoke it when the integration ends.
Layer 5: Session and Cookie Security
Even after hardening the login flow, stolen session cookies can bypass everything 2FA included. The ClickFix / infostealer attack chain specifically exfiltrates session cookies to walk into authenticated accounts without re-authenticating.
Regenerate salts and security keys
WordPress salts in wp-config.php are used to hash session cookies. If you suspect any compromise or if you’ve never changed them since installation regenerate:
- Visit api.wordpress.org/secret-key/1.1/salt/.
- Copy the output.
- Replace the salt block in
wp-config.php.
This invalidates every active session including any session an attacker may be using. All users (including you) will need to log in again.
Force logout on idle sessions
WordPress sessions last 48 hours by default (2 weeks with “Remember Me”). Shorten this for admin accounts:
// Shorten session expiration to 12 hours
add_filter('auth_cookie_expiration', function($expiration, $user_id, $remember) {
    if ($remember) {
        return 12 * HOUR_IN_SECONDS; // "Remember Me" = 12 hours instead of 14 days
    }
    return 2 * HOUR_IN_SECONDS; // Normal session = 2 hours instead of 48
}, 10, 3);
Shorter sessions reduce the window during which a stolen cookie is valid.
The Quick-Start Hardening Checklist
If you’re starting from zero, do these in order each one takes under 5 minutes:
- [ ] Enable 2FA on every admin and editor account (Wordfence → Login Security, or install WP 2FA).
- [ ] Set brute force lockout 5 failed attempts, 4-hour lockout (Wordfence settings or Limit Login Attempts Reloaded).
- [ ] Change the login URL (WPS Hide Login one setting).
- [ ] Disable XML-RPC if you don’t use it (
.htaccessblock or Wordfence setting). - [ ] Block username enumeration disable REST API user endpoint and author archives.
- [ ] Audit all admin accounts delete unknowns, enforce unique strong passwords.
- [ ] Regenerate WordPress salts in
wp-config.php. - [ ] Delete the “admin” username if it exists replace with a non-guessable name.
Total time for all eight: about 30 minutes. Threat surface reduced by roughly 95%.
What Login Security Doesn’t Cover
Login hardening is one layer. A fully secured WordPress site also needs:
- Updated software: the number-one entry point is vulnerable plugins, not weak passwords. Keep everything current.
- File integrity monitoring: catches infections that enter through plugin vulnerabilities, not through the login page.
- Backups: if everything else fails, a clean daily backup is your recovery path.
- A Web Application Firewall: blocks SQL injection, XSS, and exploit attempts that bypass login entirely.
For the complete picture, see the WordPress security guide and the security plugins comparison. If your site has already been compromised, the hacked site cleanup guide walks through the full recovery process.
WordPress Login Security FAQ
Is changing the login URL enough to protect my site?
No. It reduces automated scanning but is not a security measure on its own. Layer it with 2FA, brute force protection, and strong passwords. An attacker who knows your custom URL still needs to beat 2FA.
Should I disable wp-admin entirely?
No /wp-admin/ redirects to /wp-login.php for unauthenticated users, but it’s the entire admin interface for logged-in users. Hiding the login URL (WPS Hide Login) makes /wp-admin/ return a 404 for non-authenticated visitors, which is the correct behavior.
Is SMS-based 2FA safe?
It’s better than no 2FA, but vulnerable to SIM-swapping attacks. Use an authenticator app (TOTP) or a hardware key for admin accounts. Reserve SMS for lower-privilege accounts if it’s the only option a user will adopt.
How do I enforce 2FA for all users?
Wordfence → Login Security → allow role-based 2FA enforcement. WP 2FA offers grace periods users get a set number of days to configure their second factor before they’re locked out until they do.
What if I get locked out of my own site after enabling 2FA?
Use the recovery codes you saved during setup. If you lost those, most 2FA plugins can be deactivated by renaming their plugin folder via FTP/SFTP: rename wordfence to wordfence-disabled in /wp-content/plugins/, log in normally, then re-enable and reconfigure.
Does Cloudflare replace login security plugins?
Cloudflare provides edge-level bot filtering and DDoS protection, which reduces the volume of brute force traffic reaching your server. It doesn’t replace application-level 2FA, rate limiting, or username enumeration blocking those still need a WordPress-side plugin. The two layers complement each other.
Lock Down Your Login Today
Your login page is the most targeted URL on your site. The combination of 2FA + brute force limiting + login URL change + XML-RPC disabling eliminates the overwhelming majority of automated attacks and takes less than 30 minutes to implement. Start with 2FA. Everything else is defense in depth around it.
For the complete WordPress security framework, see the full security guide.
This guide is for informational purposes. Security requirements vary by hosting environment and threat model. Test all changes on a staging site before applying to production.